
How To Use Your Camcorder
Your On Record kit has arrived and your big day is almost here! This guide will walk you through the basics of using your camcorder and help you get the most out of your footage.
While we carefully prepare every kit so it arrives ready to go, we recommend taking some time to test everything beforehand, just to be safe. This includes making sure your batteries are fully charged, your SD card is in the camera, and you feel comfortable using the main controls.
Don’t worry — you don’t need any filming experience. The camcorder is set up to do most of the work for you. Simply follow this guide, take your time, and focus on capturing all the special moments.
If anything feels confusing or you need assistance, we’re here to help! You can reach us via text (0412096170) or email (hello@onrecord.com.au).
1. Turning the camcorder on & off
To turn the camcorder on, make sure one of the supplied batteries is inserted and open the LCD screen. The camcorder will power on automatically.
To turn the camcorder off, close the LCD screen.
If the camcorder doesn’t turn on or off automatically, press the POWER ⏻ button.
The POWER ⏻ button is located inside the LCD screen panel.
2. Starting & stopping recording
To start recording, press the START/STOP button.
This is the red dot button on the back of the camcorder.
When recording, you’ll see ‘REC’ in red on the screen.
To stop recording, press the START/STOP button again.
3. Zooming in & out
Use the ZOOM lever, labelled W / T, located on the top of the camcorder.
W (Wide) = zoom out
T (Telephoto) = zoom in
Press gently for a slow, smooth zoom. Slow zooms look best on camera.
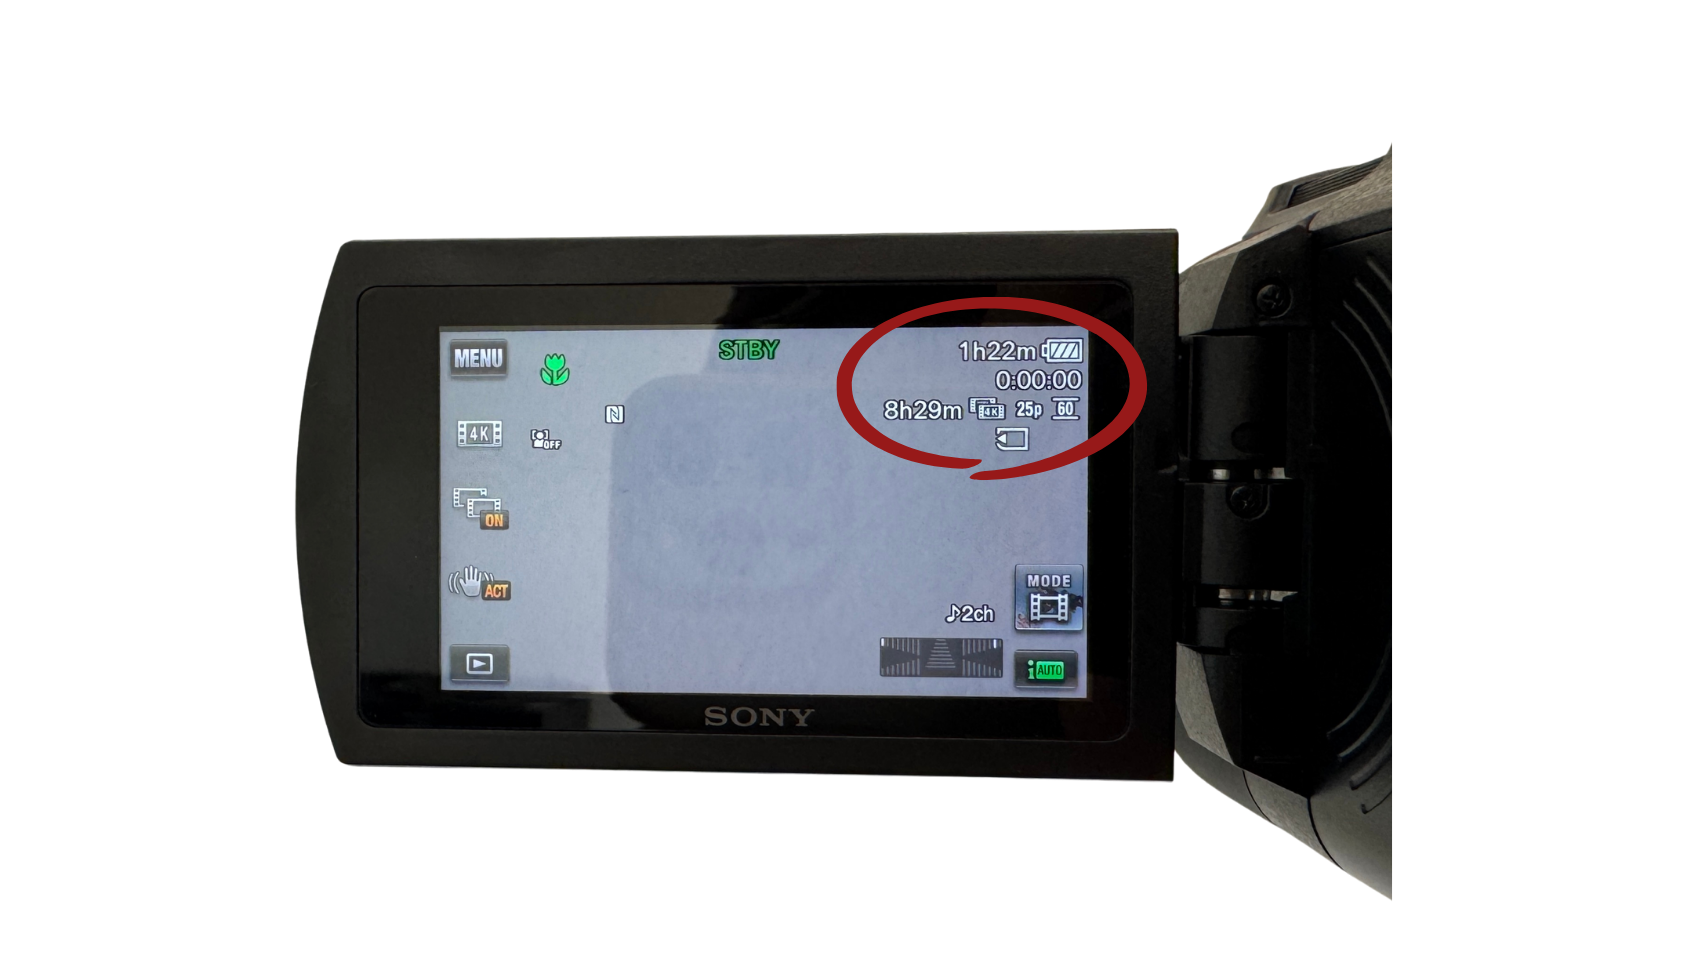
4. Checking Battery Life & SD Card
If you tap once on the screen, you’ll be able to see how much battery life you have left, along with the remaining recording time on the SD card.
Your camcorder will arrive with the SD card already installed, so you should be ready to go. We just recommend giving it a quick check beforehand for peace of mind!
5. Changing the Battery
If the battery runs low during your event:
Turn the camcorder over so you can access the battery compartment.
Push the battery release down and gently remove the old battery.
Grab a fully charged spare battery and gently insert it into the camcorder until it clicks.
6. Charging the Battery
To charge a battery while it’s in the camcorder:
Make sure the camcorder is turned off.
Plug the charger cord directly into the DC IN outlet, located under the START/STOP button.
The camcorder is charging when the indicator light is yellow.
Once the light turns off, the battery is fully charged and ready to use.

7. Attaching & Using the Flash
On the top of the camcorder, flip open the small cover to access the mount.
Take the bottom of the flash and slide it into the metal slot on the camcorder.
Push it in all the way so it feels secure & twist the small wheel underneath the light to tighten it in place.
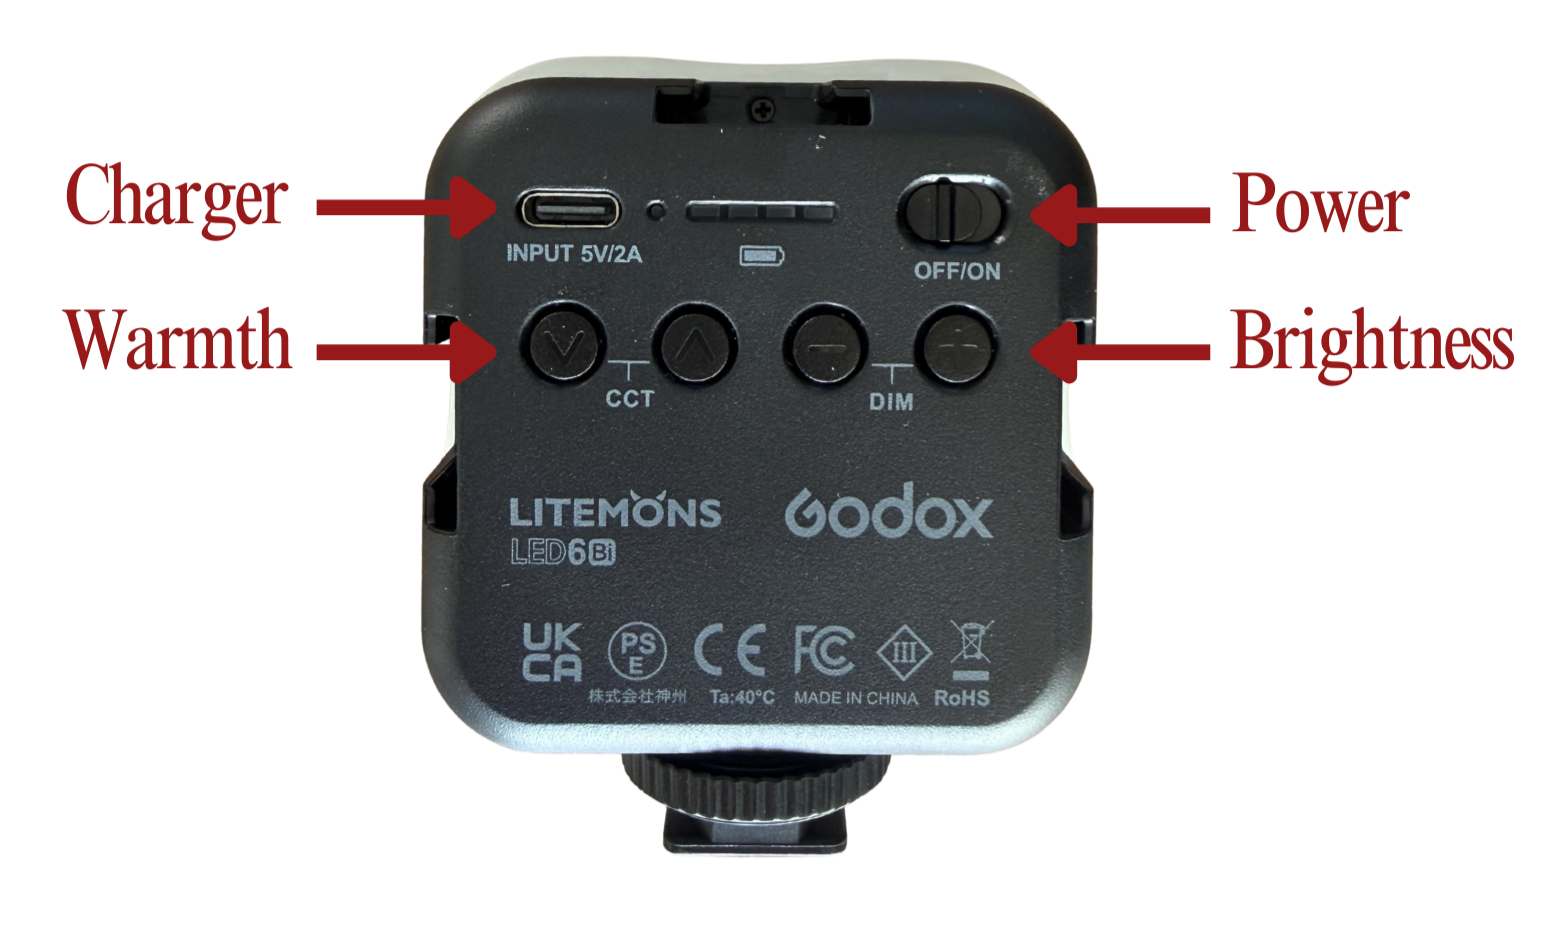
To turn the flash on/off just slide the power button across.
The flash will come pre-set for you, but if you’d like to adjust the brightness or warmth, you can adjust these by pressing the DIM button (brightness) or CCT (warmth).
9. Tall Tripod
To attach the camcorder to the tripod:
Make sure the tripod legs are fully open and standing flat on stable ground.
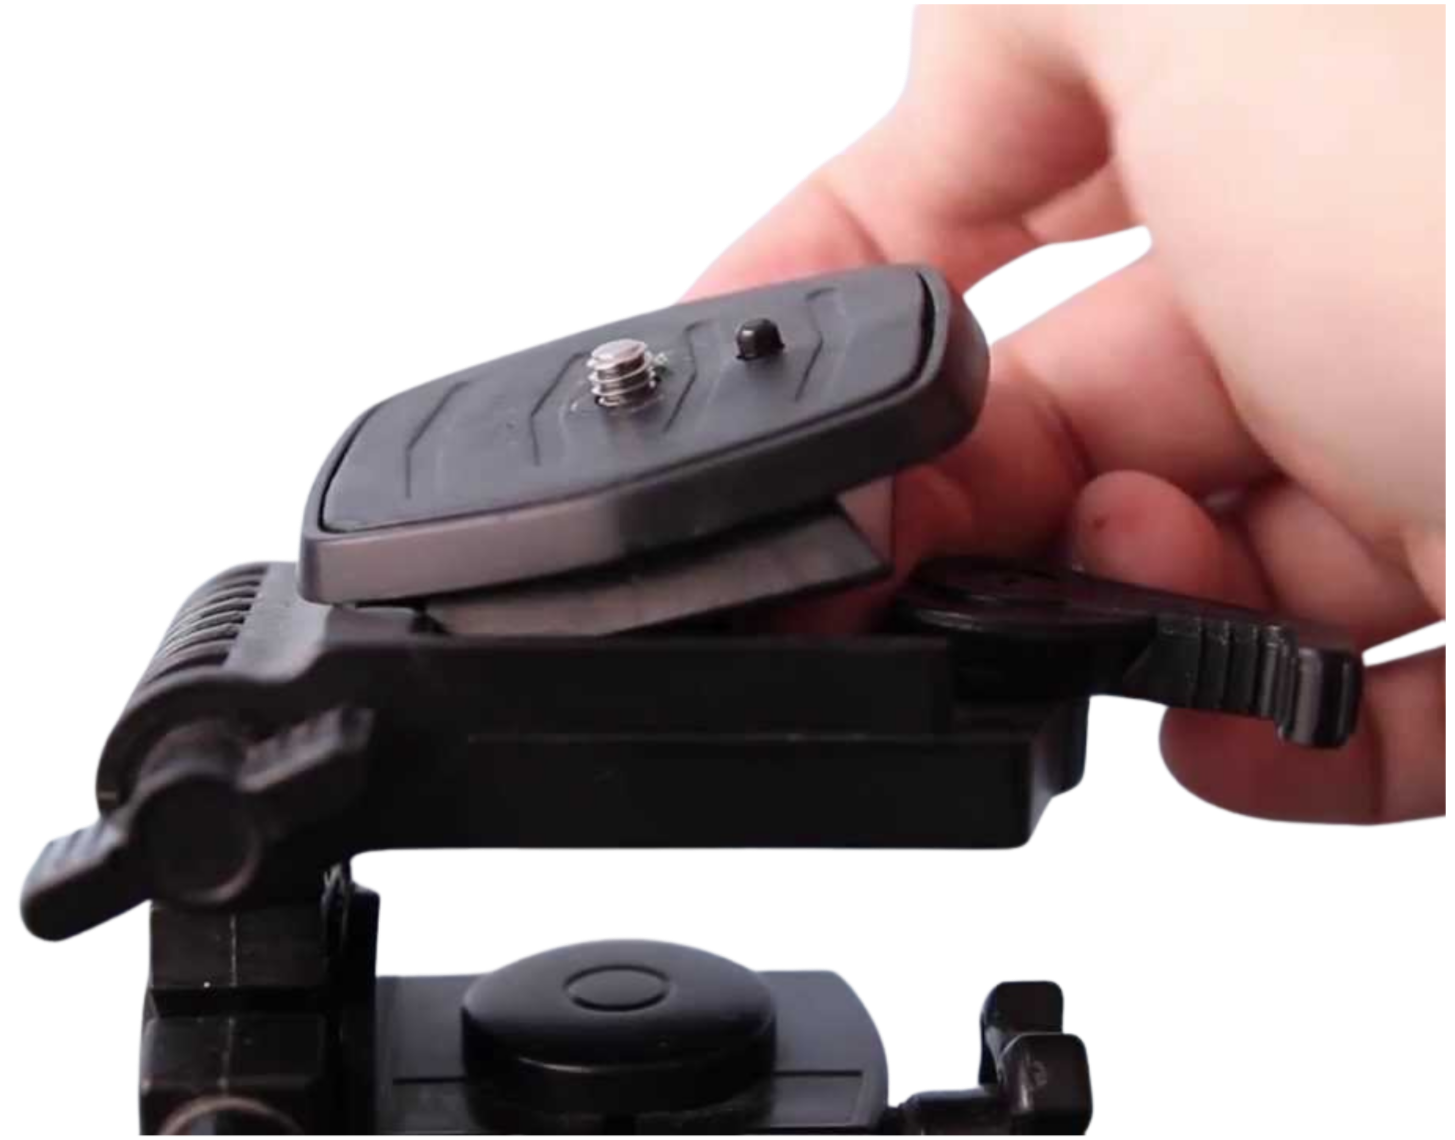
Pull back the lever on the top of the tripod to remove the mounting plate.
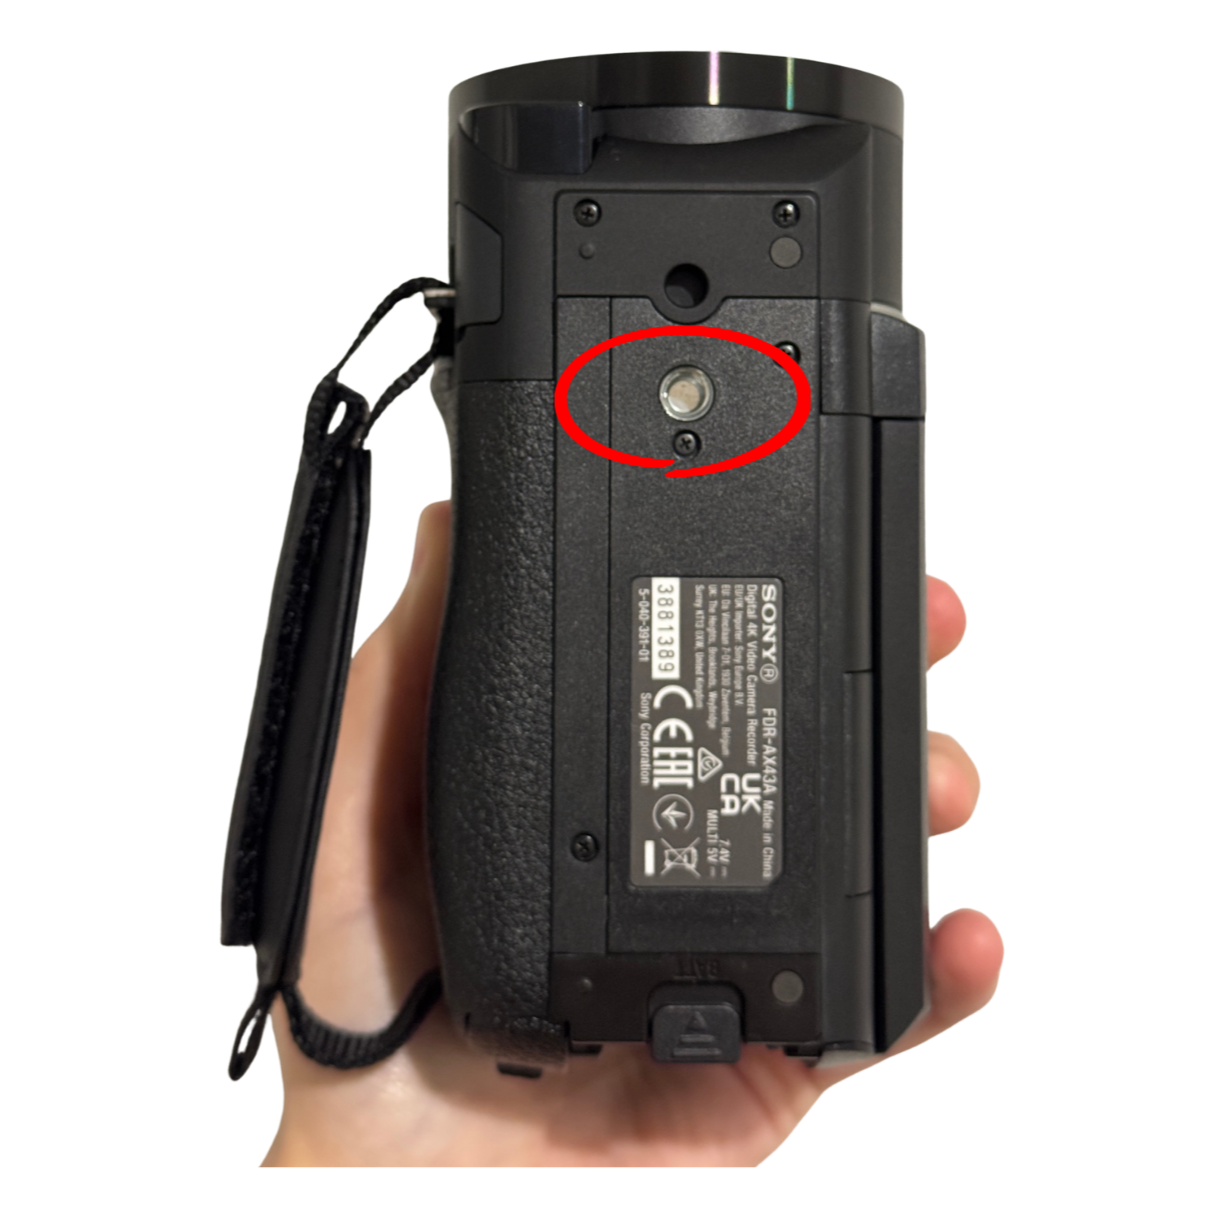
Line up the screw on the plate with the hole on the bottom of the camcorder & twist the screw until it feels tight and secure.
Place the plate (with the camera attached) back onto the tripod & push the lever back in to lock it.
Give the camcorder a gentle wiggle to make sure it’s secure!
9. Mini Microphones
Setting up your microphones
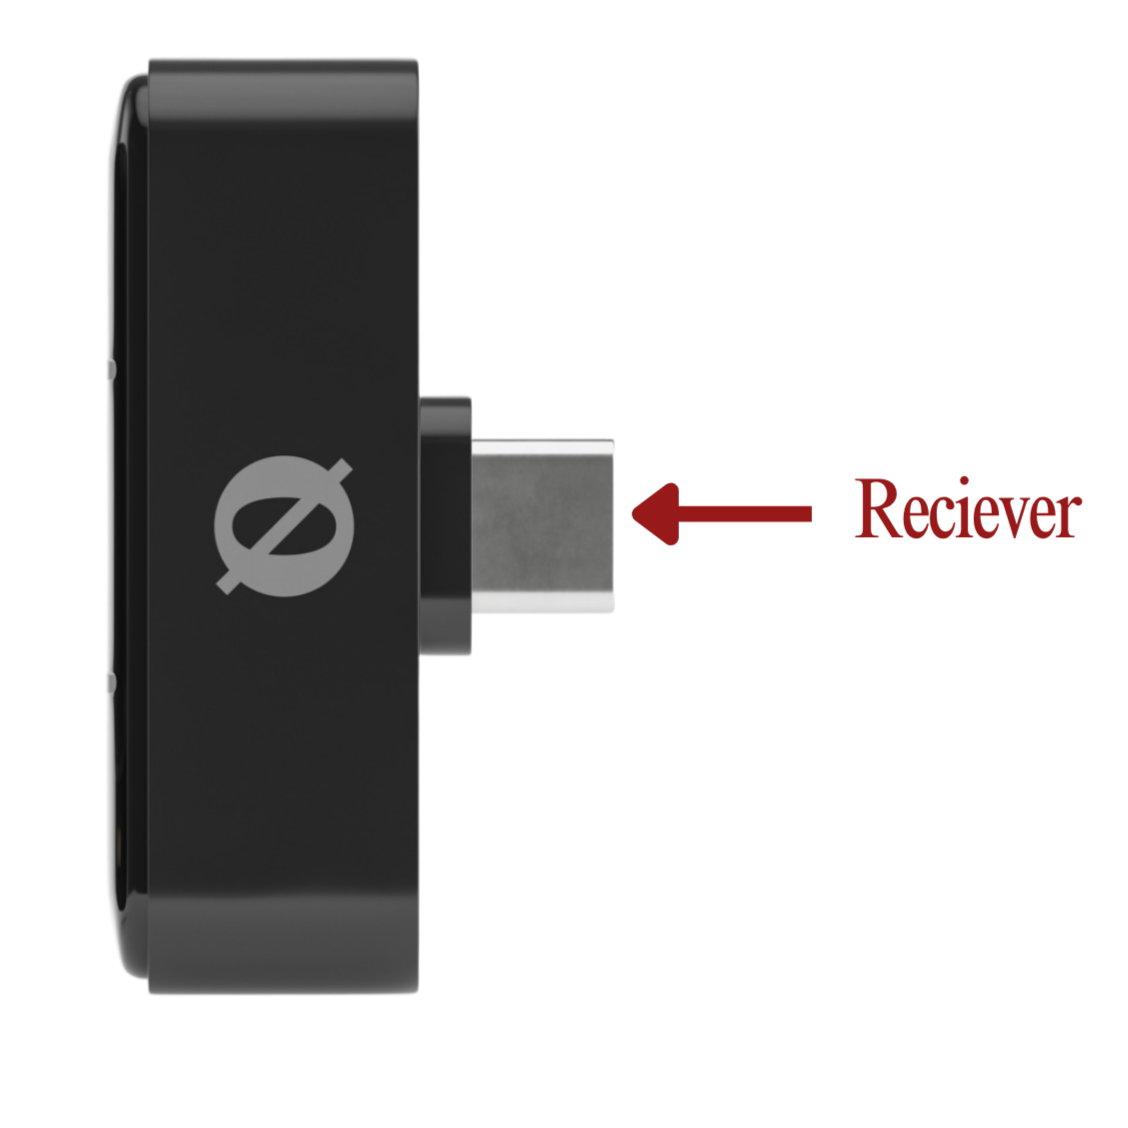
1. Plug in the receiver
Insert the USB-C receiver into your phone and make sure your Bluetooth is switched on.
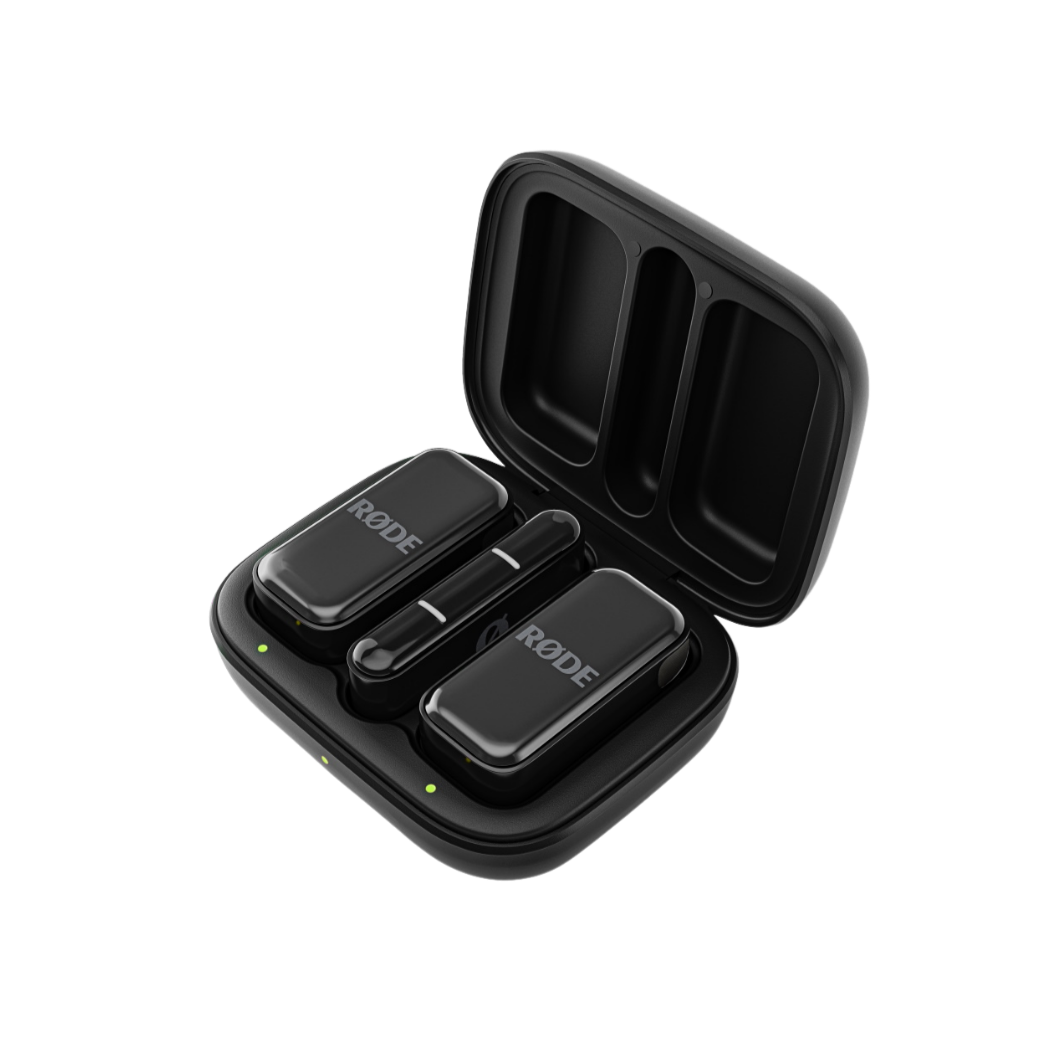
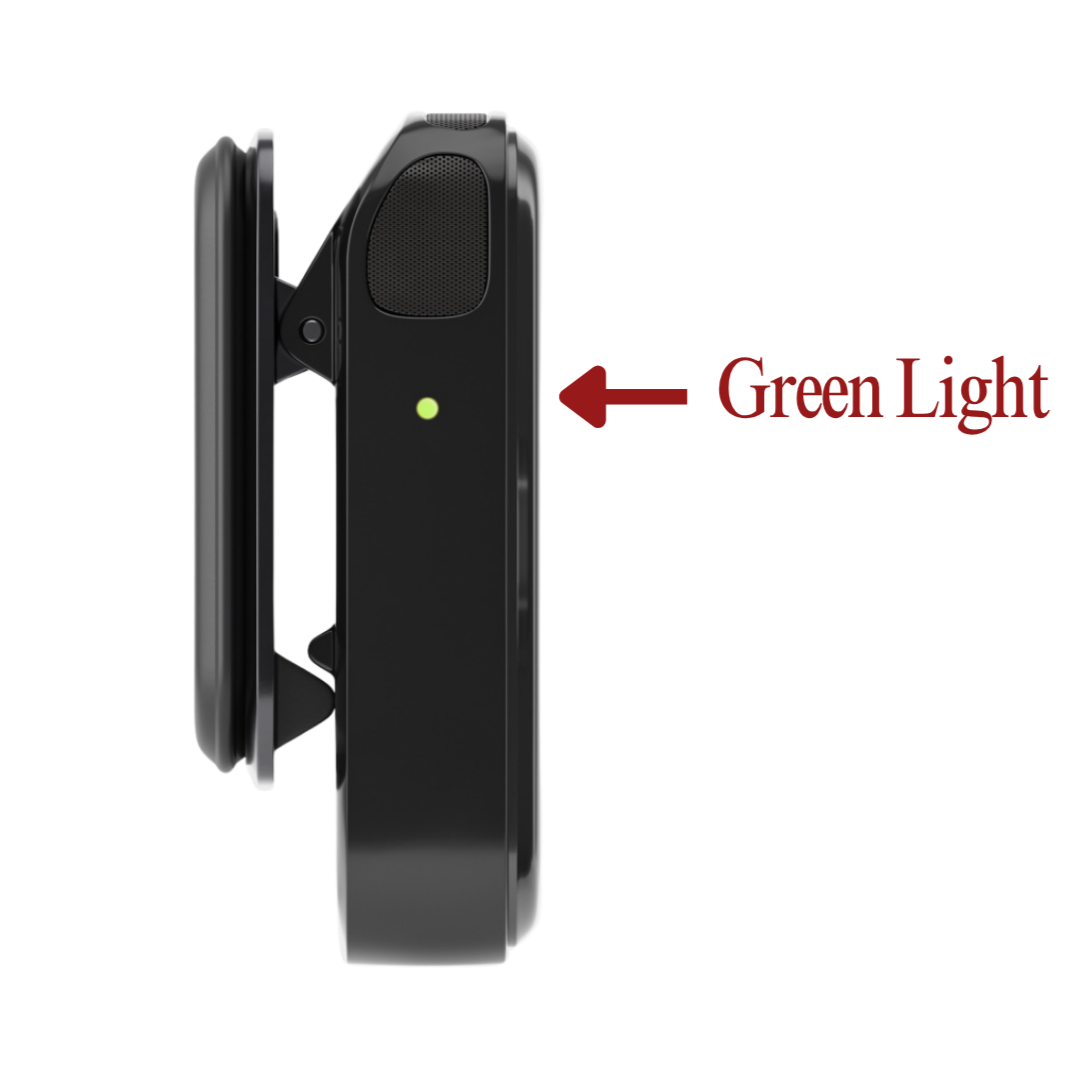
2. Check the microphones are connected
Remove both microphones from their case. The green light on the side will flash, then turn solid once connected to your phone.
3. Open your recording app
Open the app Voice Memos and do a quick test recording to make sure everything is working properly. The easiest way to test this is to start recording, then speak into the microphone from the other side of the room and play it back.
4. Attach the microphones
Clip one mic onto each person you’d like to record. We recommend one on each partner for vows, or one on your celebrant or speaker. Attach securely to a dress, lapel, tie, blazer, or shirt — around neckline height works best.
5. Press record
Hit record before your ceremony or speeches begin, and double check the timer is running.
6. Keep your phone somewhere safe
Your phone can stay connected from up to 50 metres away, but we recommend keeping it somewhere nearby and secure. You can always pop it into your On Record bag for safekeeping.
After your event
Once you receive your raw footage, we’ll send through a Dropbox link where you can easily upload your audio files for us to include in your custom edit!
Getting The Most Out Of Your Footage
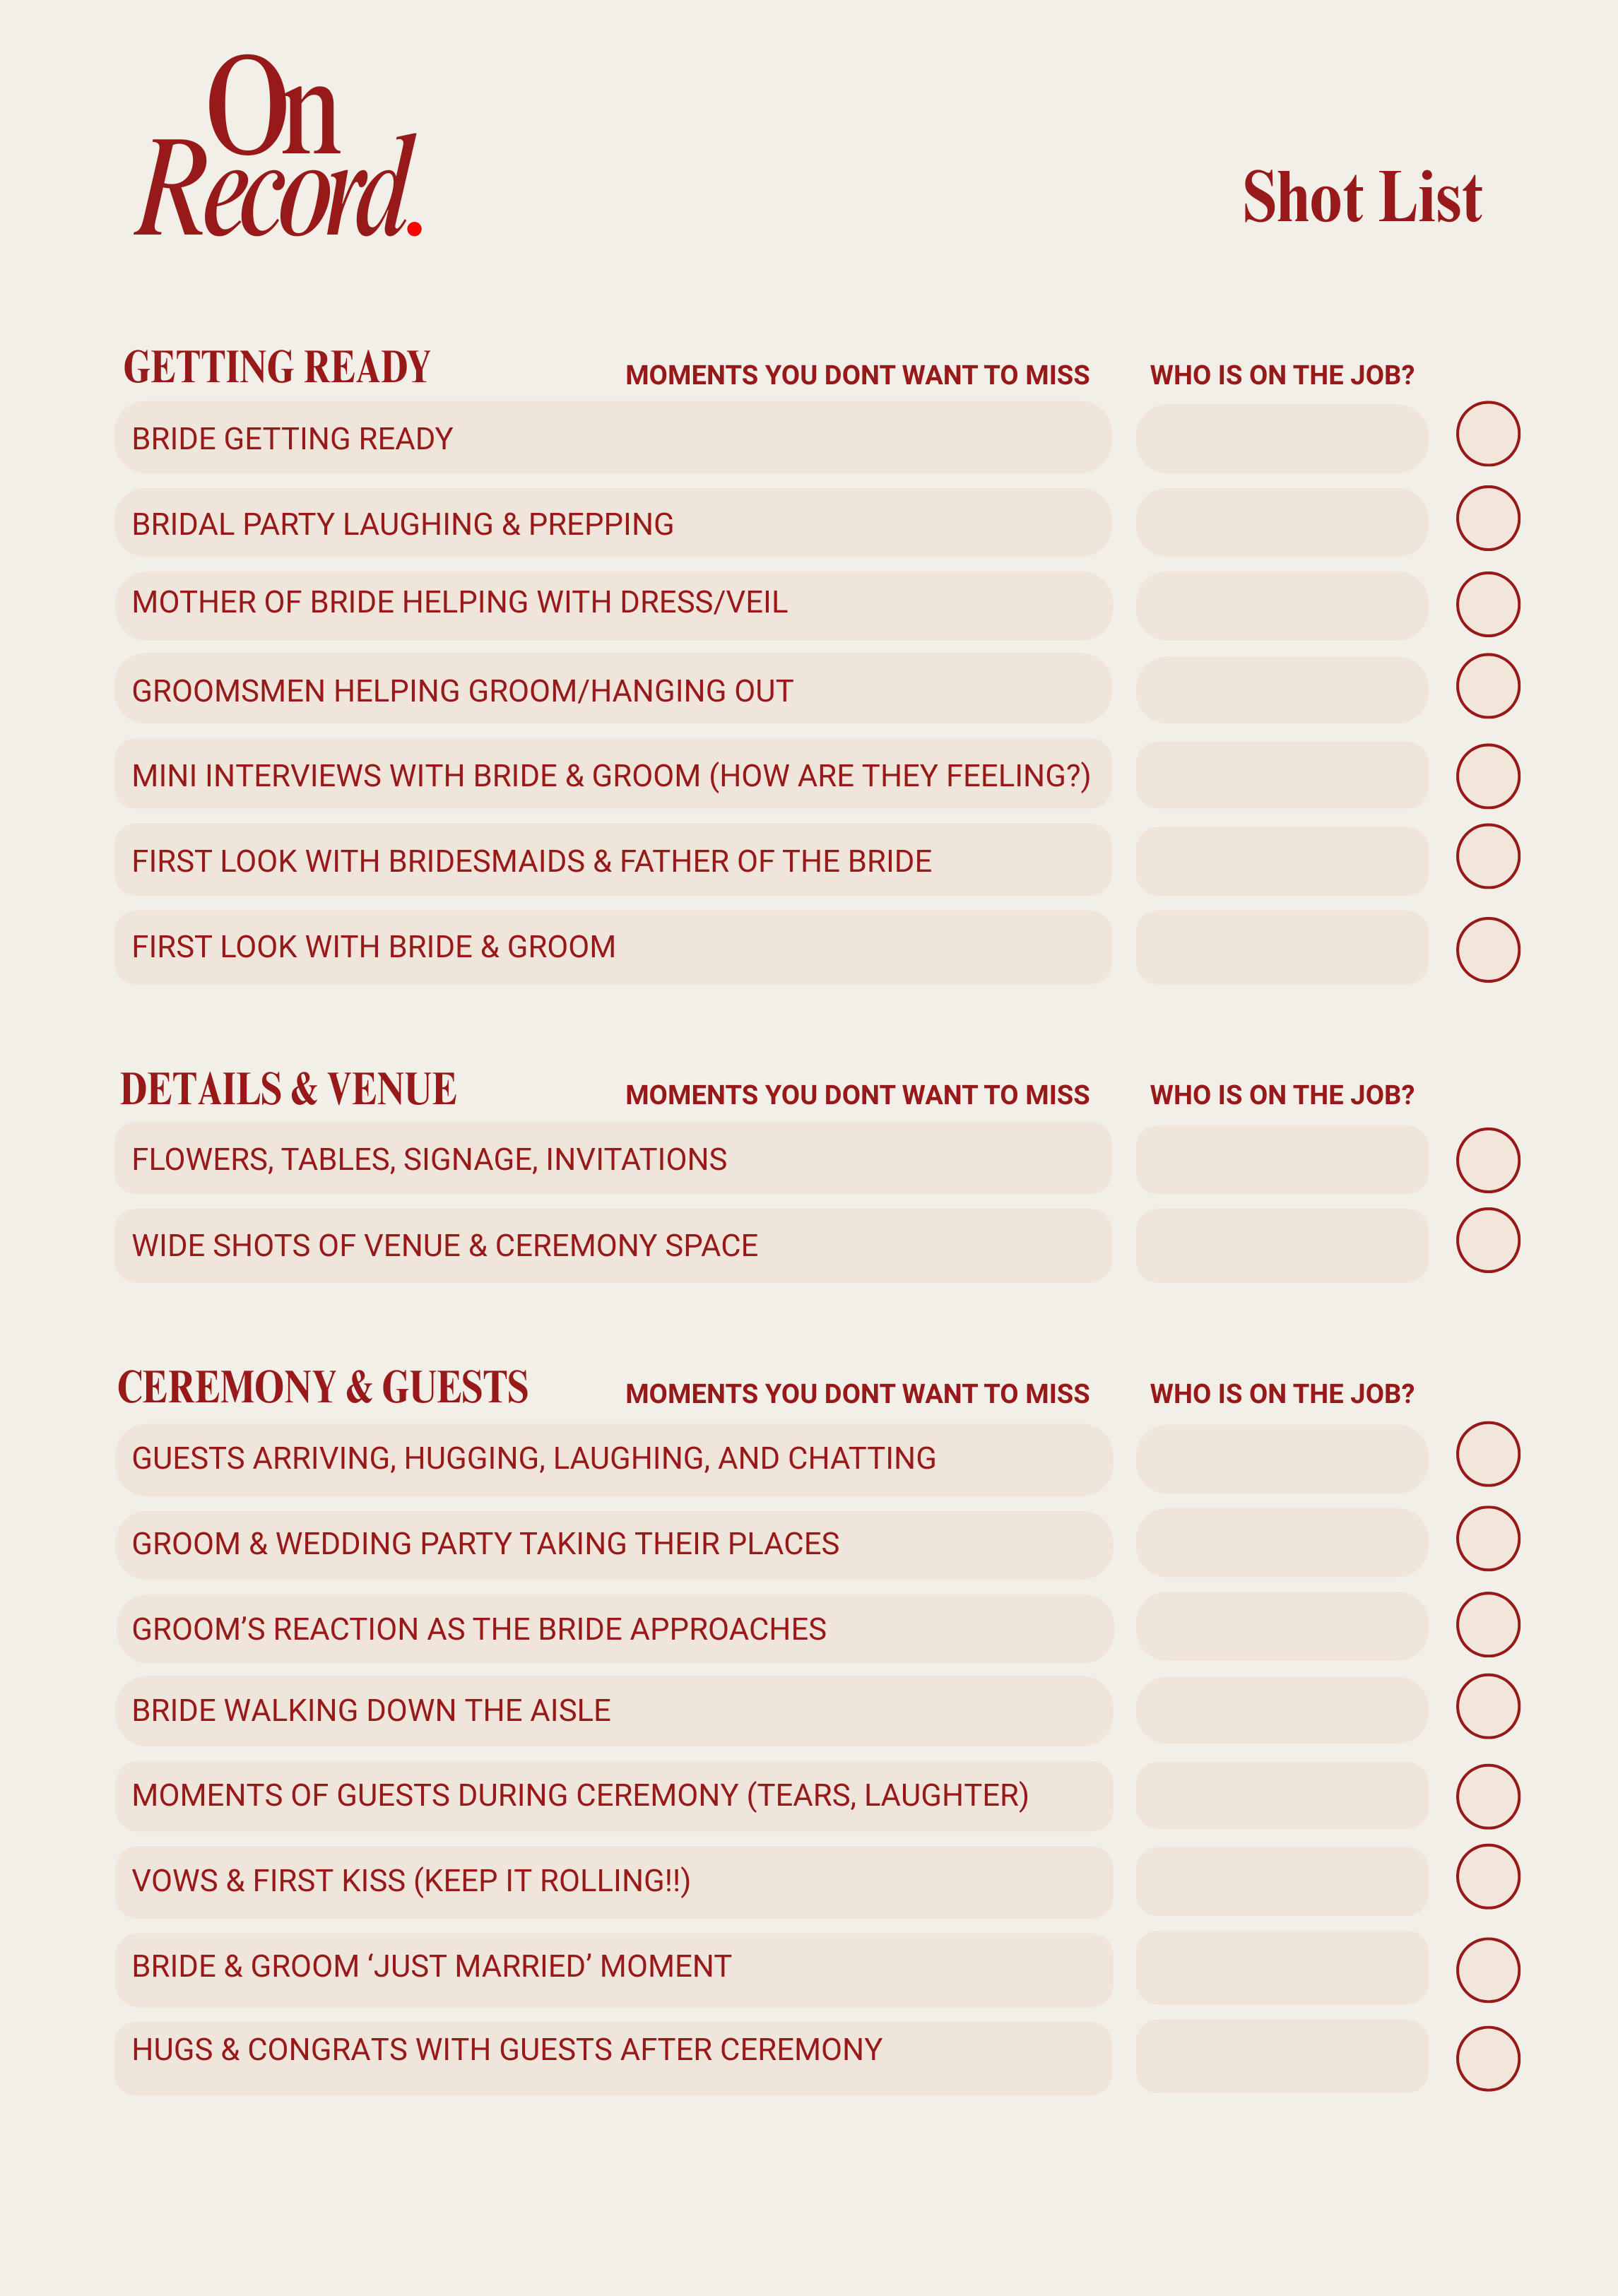
Moments to capture
You’ll find a suggested shot list included in your kit to help guide you on the day. If you’d like to tailor it to your event or add your own special moments, we’ve included an editable version here so you can customise it to suit you!
Tips & Tricks
Keep your shots steady
The camcorder has a built-in stabiliser (gimbal) that helps keep your shots nice and steady. To help it work its magic even more, try holding the camcorder with both hands, this helps keep your footage extra smooth!
Avoid zooming too quickly
Slow, gentle zooms always look better. Try to avoid constantly zooming in and out, as this can make footage harder to edit & watch back. If you’re unsure, it’s often better to stay slightly wider and let the moment unfold naturally.
Let moments run a little longer
Try to keep recording for a few seconds before and after important moments. This helps make the footage feel more natural and ensures nothing important gets missed!
Capture reactions and little details
Some of the most special memories are the small moments — guests laughing, hugs, decorations, and behind-the-scenes interactions. These help tell the full story of your day.
Stay close enough for clear audio
The camcorder captures sound best when you are reasonably close to the action, especially during speeches, vows, or important conversations.
When in doubt, keep recording
The more footage, the better! It gives you more moments to look back on and helps create a fuller story of your event.
But most importantly, have fun, let loose, and enjoy every moment of your big day. The imperfect moments often make it the most special, and we can’t wait to put it all together and create something magic for you!